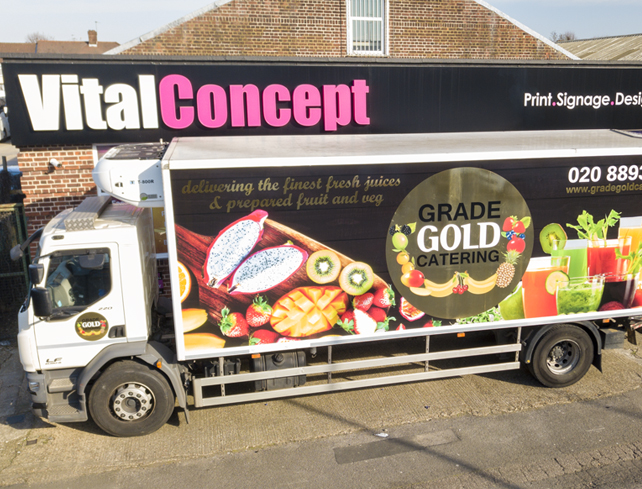
Van wraps are an effective, budget-friendly way to turn your vehicle into a mobile advertisement. With bold graphics, your brand gains visibility wherever you go. While DIY wraps may seem tempting to save money, they come with risks. Wrapping a van isn’t as simple as applying a sticker without the proper tools and knowledge, small mistakes can ruin the result. In this blog, we’ll highlight the top 5 common van wrap errors and provide tips on how to avoid them. If you're considering wrapping your van yourself, this guide will help ensure a professional, flawless finish.
1. Skipping Surface Preparation
One of the biggest mistakes DIYers make is not properly cleaning and preparing the van before applying the wrap.
Why it’s a problem:
If there’s any dirt, dust, wax, or grease on the surface, the wrap won’t stick properly. Over time, this leads to bubbles, lifting edges, and peeling corners. Even small areas of rust or chipped paint can cause big problems later.
What to do instead:
- Wash your van thoroughly with soap and water.
- Use an alcohol-based cleaner to remove any residue.
- Don’t forget tricky areas like seams, door handles, and wheel arches.
- Dry the surface completely before you start wrapping.
Imagine trying to paint on a dirty wall the result won’t last long. Wrapping your van is the same. A clean surface is the foundation of a long-lasting wrap.

2. Using Low-Quality Materials
Another common mistake is choosing the cheapest wrap material available.
Why it’s a problem:
Low-cost vinyl might save money up front, but it won’t last. Poor-quality materials tend to:
- Fade in the sun.
- Crack in cold weather.
- Shrink over time.
- Be hard to remove without damaging the paint.
What to do instead:
Invest in good-quality vinyl from trusted brands like 3M, Avery Dennison, or Oracal. These products are made for vehicle wraps and are designed to handle the curves, edges, and movement of a van.
Look for vinyl that:
- Is UV-resistant.
- Is weatherproof.
- Comes with air-release technology (to reduce bubbles).
- Has a strong adhesive but can be removed cleanly when needed.
While you might find good deals at your local sign shop, be sure to ask about the brand and specs before buying.
When investing in van graphics quality materials ensure that your wrap remains vibrant and intact, making your branding efforts effective and long-lasting.
3. Not Using the Right Tools or Techniques
Trying to wrap a van with just your hands and a credit card for smoothing? That’s a recipe for disaster.
Why it’s a problem:
DIY wrappers often don’t have the correct tools or experience. Without them, you can end up with:
- Wrinkles and creases.
- Air bubbles.
- Poorly trimmed edges.
- Uneven or misaligned panels.
What to do instead:
Use professional tools such as:
- A heat gun (for stretching and shaping the vinyl).
- Felt-edge squeegees (for smoothing).
- Knifeless tape (for safe, clean cuts).
- A vinyl cutter or sharp blade.
- Gloves and magnets to help with positioning.
Also, take your time. Don’t rush. Start with flat panels before moving on to tricky curves. And if this is your first attempt, consider practising on an old piece of metal or a small section of your van.
Remember: wrapping is both a skill and an art. The more you practise, the better you’ll get.
4. Poor Design and Layout Choices
You might be great at wrapping, but if the design is bad, the final result still won’t look professional.
Common DIY design mistakes:
- Using text that’s too small to read from a distance.
- Placing important info (like phone numbers) on awkward curves or moving parts like doors.
- Using low-resolution images or pixelated logos.
- Choosing colours that don’t contrast well, making the design hard to read.
What to do instead:
- Keep your branding clear and bold.
- Use high-resolution files for all graphics and logos.
- Test your design on a digital van template before printing.
- Make sure your contact info and main message are easily visible from all angles parked or on the move.
If design isn’t your strong point, it’s worth getting help from a graphic designer. Many sign shop London companies also offer design services take advantage of their expertise to make your van stand out.
5. Skipping the Finishing Touches
The final mistake people often make is skipping important post-wrap steps.
Why it’s a problem:
Without proper finishing, even a good wrap can start to fail after a few weeks. Common issues include:
- Lifting edges.
- Water or dirt getting under the vinyl.
- Peeling from high-contact areas like doors or mirrors.
What to do instead:
- Use a heat gun to “post-heat” the vinyl this helps set it in place, especially on curves and corners.
- Press down all edges and seams firmly.
- Avoid washing the van for a few days to let the adhesive cure.
- Apply edge seal tape if needed for extra protection.
Think of it like sealing a letter — you wouldn’t send it without making sure the envelope is properly closed. Do the same for your van wrap to make it last.
Conclusion
DIY van wraps can be rewarding but come with challenges. Common mistakes include improper surface prep, using low-quality vinyl, lacking the right tools, poor design choices, and skipping finishing steps like heating and sealing. Avoiding these errors ensures a better, longer-lasting result. However, van wrapping requires time, patience, and skill. If you're unsure about doing it yourself, professional help is a wise investment. Sign Company London offers expert van graphics solutions, from design support to high-quality materials and installation. Contact us today or visit your local sign shop for a moving advert that truly stands out.