Digitizing for embroidery is a crucial process that converts artwork into a format that embroidery machines can read and stitch onto fabric. Whether you're new to the world of embroidery or an experienced professional, understanding the nuances of digitizing is key to achieving high-quality, detailed embroidered designs. In this guide, we will explore the importance of digitizing for embroidery, the steps involved, and how to perfect your design.
What Does Digitizing for Embroidery Involve?
At its core, digitizing for embroidery is the process of converting a design or image into an embroidery machine-readable file. This file contains instructions on how to stitch the design onto fabric, detailing everything from the types of stitches to the stitch sequence, colors, and placement. Without this step, an embroidery machine wouldn’t be able to create the intricate patterns and logos we see in custom garments, branded merchandise, and more.
Effective digitizing ensures that the finished product looks clean, professional, and well-constructed. Whether you're working with logos, text, or custom artwork, accurate digitizing allows the machine to replicate the design exactly as intended.
Why is Digitizing Crucial for High-Quality Embroidery?
Precision and Detail: Proper digitization ensures the design retains its fine details, even when converted into stitches. Without precise digitization, intricate details could be lost, and the finished product may look blurry or inaccurate.
Optimized Machine Performance: Embroidery machines require specific file formats and stitch instructions to operate correctly. When a design is digitized accurately, the machine can perform without issues such as thread breaks or uneven stitching, reducing downtime and errors.
Fabric and Thread Compatibility: Each fabric type requires different techniques to ensure the embroidery adheres well and maintains its appearance. Digitizing for embroidery allows you to adjust stitch density, stitch type, and order to accommodate different fabric types and ensure the design stays intact over time.
Consistency Across Designs: Digitization helps ensure that designs can be consistently reproduced, whether it's a small batch of custom t-shirts or a large corporate order. This consistency is key for businesses and brands that rely on maintaining a uniform look across all embroidered products.
The Step-by-Step Process of Digitizing for Embroidery
Selecting the Design: The first step is selecting or creating the artwork you want to digitize. This could be a logo, custom graphic, or text. The quality of the original design is important as it will affect the final result.
Converting the Design to Vector Format: Embroidery machines work best with vector images because they can be resized without losing quality. If your original design is in a raster format (e.g., JPG, PNG), it must be converted to a vector format (e.g., SVG, EPS) before it can be digitized.
Importing to Embroidery Software: Once your design is in the right format, you’ll use specialized embroidery software (such as Wilcom Embroidery Studio, Hatch Embroidery Software, or TruEmbroidery) to convert the design into a stitch file. The software allows you to manipulate the design, add stitch types, adjust densities, and change stitch directions.
Choosing the Right Stitches: There are several types of stitches you can assign to your design:
- Satin Stitches: Great for narrow outlines and detailed text.
- Fill Stitches: Best for large areas that need to be filled with color or texture.
- Running Stitches: Used for fine lines and outlines. Optimizing the Stitch Sequence: The order in which the machine stitches the design is critical for efficiency and aesthetics. Embroidery software allows you to arrange the stitch sequence to minimize thread breaks, reduce the chance of mistakes, and ensure a smooth process. Test and Tweak: Once the digitizing is complete, it’s time for a test stitch-out. This step is crucial because it allows you to see how the design looks on fabric. Based on the test, adjustments may be made to improve the stitch density, order, or even the type of stitch used.
Save and Export: After the design has been finalized and tested, it is saved in a file format compatible with your embroidery machine. Common formats include:
- DST: Used for Tajima and many commercial machines.
- PES: Typically used with Brother and Babylock machines.
- EXP: A format common for industrial-grade embroidery machines.
Tools You Need for Successful Digitizing
Embroidery Software: The most important tool for digitizing is embroidery software. Programs like Wilcom, Hatch, and CorelDRAW allow you to import, adjust, and export designs in machine-readable formats.
Graphics Tablet: A graphics tablet can help you trace or modify designs more precisely. This tool is especially helpful for complex or custom designs where fine details need to be added manually.
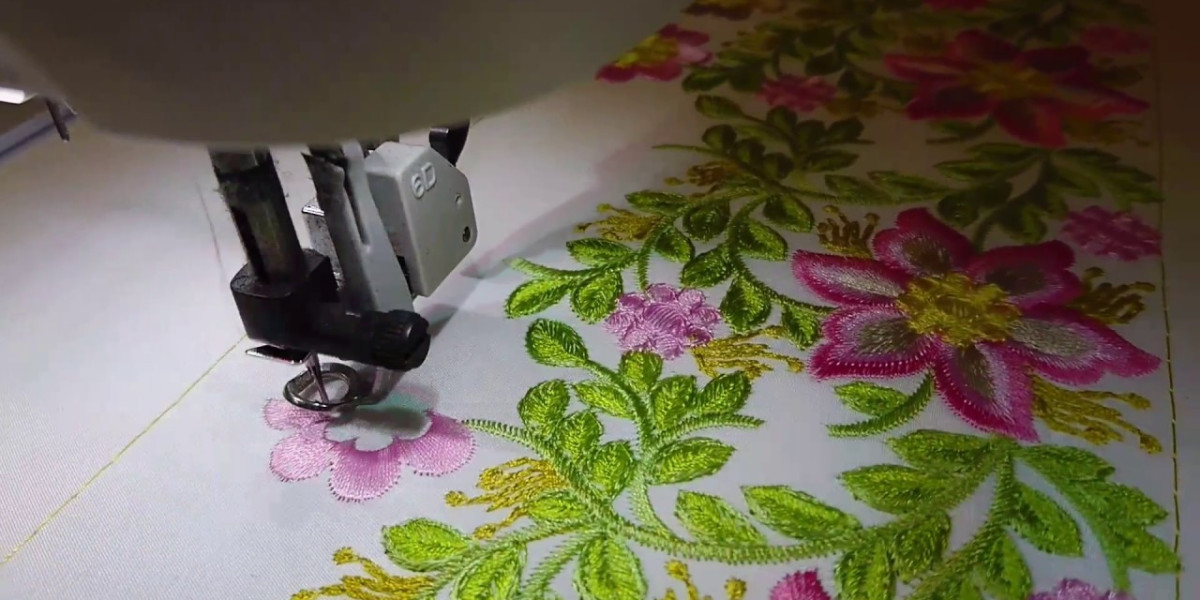
Embroidery Machine: This is the final tool needed to bring your digitized design to life. The embroidery machine reads the digital stitch file and executes the design on fabric. It's crucial that your machine can read the file format you've chosen when saving the design.
Conclusion
Digitizing for embroidery is an art that requires both technical knowledge and creative skill. By understanding the process and using the right tools, you can create beautiful, professional embroidery designs that stand the test of time. Whether you're digitizing logos for a business, creating custom apparel, or making personalized gifts, mastering the digitizing process will ensure you achieve high-quality, consistent results.
Commonly Asked Questions About Digitizing for Embroidery
What file format should I use for embroidery?
Embroidery machines require specific formats for proper function. Some of the most common formats include:
- DST: A popular format for commercial machines.
- PES: Used by Brother and Babylock machines.
- EXP: Used by industrial machines and larger operations.
Can I digitize my own artwork?
Yes, it is possible to digitize your own artwork, but it requires the right software and some practice. Many programs offer tutorials to help beginners learn the process. Start with simpler designs and gradually move to more complex artwork as you gain confidence.
How long does it take to digitize a design?
The time required to digitize a design varies depending on its complexity. Simple designs may take about 30 minutes, while more intricate designs can take several hours, especially if test stitch-outs and adjustments are needed.
Can I use a photograph for embroidery?
Yes, photographs can be digitized, but they often need to be simplified to reduce complexity. You’ll need to convert the photo into a vector format and adjust it to fit the limitations of embroidery. Photos with high contrast and clean lines are ideal for this process.
What type of stitch is best for embroidery?
The ideal stitch type depends on the design. For example, satin stitches are great for text and fine lines, fill stitches are used for covering larger areas, and running stitches are perfect for details and outlines. The stitch type should align with the design’s goals.
How can I prevent thread breakage during embroidery?
To prevent thread breakage, ensure that your embroidery machine’s tension is properly adjusted, use the correct type of thread, and make sure the digitized design has the right stitch density. Test stitching on fabric before starting the final run can also help identify potential issues.